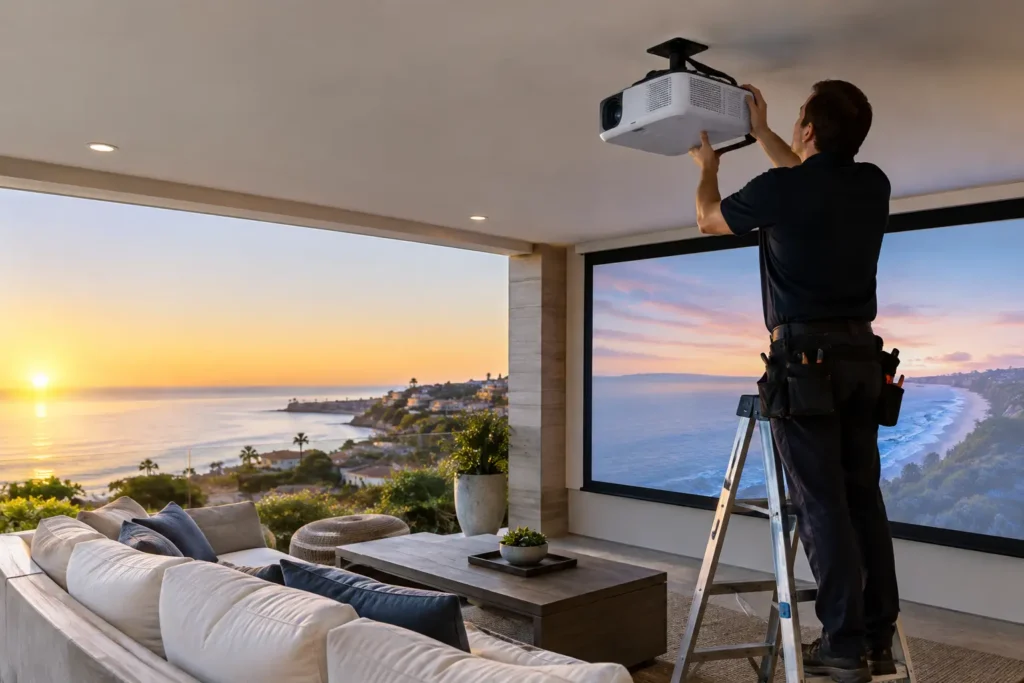
A great projector system can make a movie night, playoff game, or family gathering feel far more immersive than a large TV ever could. But Laguna Beach projector installation is not simply a matter of hanging a projector and turning it on. The room, screen, lighting, wiring, seating, and audio all need to work together. Get one of those details wrong, and even premium equipment can look dim, sound weak, or become frustrating to use.
For coastal homes, there is often another consideration: a beautiful view and abundant natural light. Those are excellent features of a home, but they change how a projection system should be designed. The right setup protects the room’s look while delivering the picture quality you expected.
Start With the Room, Not the Projector
Many homeowners begin by comparing projector brands, resolution, or brightness ratings. Those specifications matter, but the room should lead the conversation. A dedicated theater with dark walls and controlled lighting needs a very different system than a bright living room with large windows, vaulted ceilings, and an open floor plan.
First, consider where people will actually sit. The viewing distance helps determine the ideal screen size. A screen that is too small can make a projector feel underwhelming. One that is too large may force viewers to move their eyes constantly or reveal limitations in lower-quality streaming content.
Ceiling height and projector placement are equally important. Most projectors have specific throw-distance requirements, meaning they must sit within a particular range from the screen to create the desired image size. Mounting the unit where it looks convenient, rather than where the optics require it, can lead to a picture that is difficult to align or impossible to fill correctly.
An experienced installer measures the room, confirms sightlines, identifies mounting locations, and plans the equipment path before installation begins. That early planning is what makes the finished system feel intentional instead of added on.
Light Control Makes or Breaks Projector Performance
Projectors create images with reflected light, which means ambient light is their biggest competitor. In a darker media room, a standard white screen may provide a beautiful, cinematic image. In a sun-filled great room, the same screen can look washed out during the day.
This does not mean a projector cannot work in a bright Laguna Beach home. It means the system should be selected for the conditions. A brighter projector may be appropriate, but brightness alone is not the whole answer. Screen material can make a major difference. Ambient-light-rejecting screens are designed to reduce the impact of light entering from the sides or above, helping preserve contrast when shades are open.
Window treatments may also be part of the solution. Motorized shades can be incorporated into a smart home system so the room automatically adjusts for movie viewing. For some homeowners, that creates the best balance: open, light-filled living during the day and a theater-like environment when it is time to watch.
There is always a trade-off. High-performance screens and brighter projectors can raise the budget. A professional recommendation should be based on how and when you use the room, not on a one-size-fits-all equipment package.
Choosing the Right Screen Type
A screen is not just a white rectangle on the wall. It affects image brightness, contrast, color, and the overall appearance of the room. Fixed-frame screens are often the best choice for a dedicated theater because they stay perfectly flat and deliver a polished, cinema-style look.
For multi-use rooms, a motorized screen may be the better fit. It can disappear into a recessed ceiling pocket or a discreet housing when not in use, keeping the room open for everyday living. Recessed installations should be planned carefully, especially during a remodel, because power, control wiring, framing, and screen housing all need to be addressed before drywall is complete.
Some walls can be prepared for projection, but painted-wall projection is rarely the best answer for homeowners seeking a premium result. Even a smooth wall can have texture, color variation, and imperfect flatness that affect the picture. A properly selected screen provides a more consistent image and a finished look that complements the investment in the projector.
Clean Wiring Is Part of a Professional Installation
The picture should be the focus, not the cables. A well-planned projector installation conceals HDMI, network, control, and power connections wherever possible. This may involve running low-voltage wiring through walls or ceilings, using conduit for future upgrades, and locating source equipment in a nearby cabinet, media closet, or equipment rack.
Conduit is especially valuable for long cable runs. Technology changes quickly, and a pathway makes it much easier to replace an HDMI cable or add a new connection later without opening finished walls. That detail may not be visible after installation, but it can save substantial time and disruption down the road.
Reliable networking matters too. Streaming 4K content, controlling equipment from an app, and receiving projector updates all depend on a stable connection. When possible, a hardwired network connection is preferable to relying entirely on WiFi. If the home has weak coverage in the theater area, a WiFi upgrade may be worth addressing as part of the project.
Audio Completes the Theater Experience
A large projected image without capable sound can feel flat. At minimum, a quality soundbar can significantly improve dialogue and impact over built-in projector speakers. For a more immersive room, surround sound or Dolby Atmos adds a sense of space that makes movies, concerts, and games more engaging.
Speaker selection depends on the room and aesthetic goals. In-wall and in-ceiling speakers can provide excellent performance while preserving a clean design. Freestanding speakers may be the right choice for listeners who want a more traditional high-performance audio setup. Neither approach is automatically better. The best fit depends on the room layout, furnishings, listening habits, and how visible you want the equipment to be.
A professional installation also includes proper speaker positioning and calibration. Even excellent speakers can sound disappointing when they are placed too high, too close together, or incorrectly balanced. Small adjustments in location and tuning often make a noticeable difference.
Make the System Easy for Everyone to Use
A projector system should not require a stack of remotes and a troubleshooting session before every movie. The most satisfying installations simplify everyday use with one remote, a wall keypad, or a smart home control interface.
With the right programming, one button can turn on the projector, lower the screen, set the correct input, start the audio system, and adjust the lights. When the movie ends, the same system can shut everything down in the proper sequence. This is particularly helpful because projectors often need a cooldown period before power is fully removed.
Control design should stay practical. Some homeowners want complete smart home integration, while others prefer a simple universal remote that every family member and guest can understand. The goal is not to add complexity. It is to make a sophisticated system feel easy to enjoy.
When to Plan a Projector Installation
The best time to plan a Laguna Beach projector installation is before or during a remodel, when walls and ceilings are accessible. That allows for hidden wiring, recessed screen housing, dedicated power, speaker pre-wiring, and thoughtful equipment placement. It is also entirely possible to create an excellent system in a finished home. The approach simply needs to account for existing construction and the least disruptive cable routes.
Before buying equipment, it helps to answer a few practical questions: Will the room be used mostly at night or throughout the day? Is the space dedicated to entertainment or shared with daily living? Do you want the screen visible, or should it disappear? Will the system be used for movies, sports, gaming, or all three? Clear answers lead to better recommendations and fewer costly changes later.
Tri Star Home Theater designs projector systems around the way each household actually lives, with attention to picture quality, clean installation, sound, controls, and long-term reliability. The best system is the one that disappears into your routine and gives your room a reason to bring people together.
Ready for a free consultation? Let’s get in touch! Call (949) 878-0531 Today