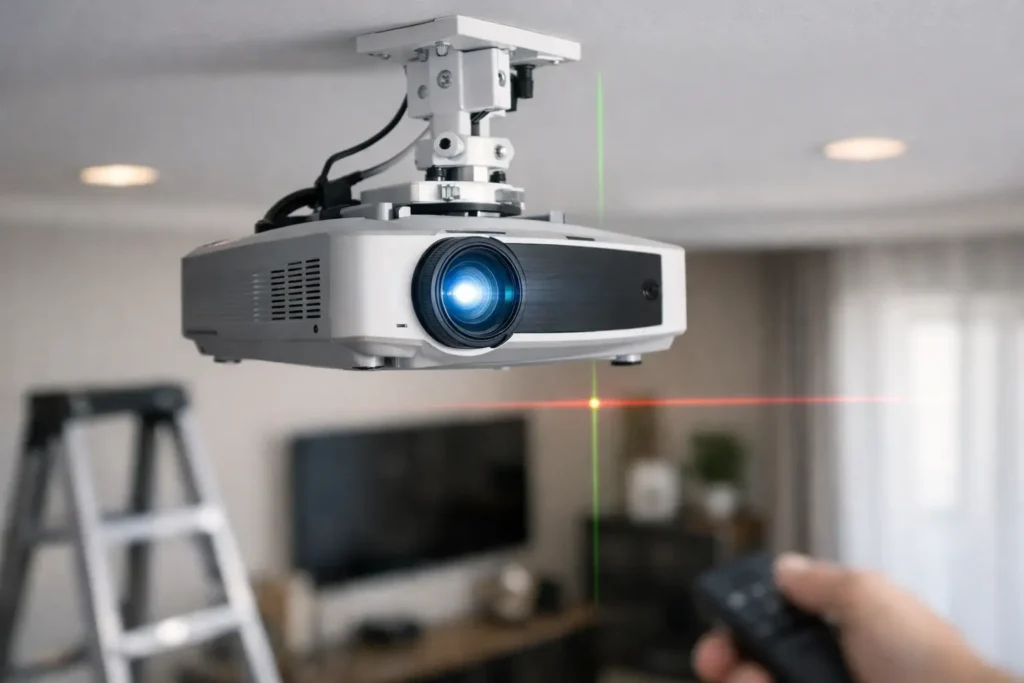
A ceiling-mounted projector can make a room feel like a true home theater, but only when the image lands exactly where it should. This projector placement guide ceiling approach helps you avoid the problems we see most often: a picture that is too large, a projector mounted off-center, visible cables, blocked airflow, or a screen that sits too high for comfortable viewing.
The right location is not simply the center of the ceiling. It is the point where your projector, screen size, seating layout, room lighting, wiring path, and ceiling structure all work together. Planning those details before drilling protects both your equipment and the clean look of your home.
Start With the Screen, Not the Projector
The screen location should determine the projector location, not the other way around. Begin by choosing the wall that provides the best viewing experience. In most rooms, that means a wall with limited windows, minimal direct sunlight, enough width for the desired screen size, and a practical route for power and AV wiring.
Screen height matters as much as screen size. A common mistake is mounting the screen too high because there is furniture, cabinetry, or a fireplace below it. For relaxed movie viewing, the middle of the screen should generally be close to seated eye level, though the exact height depends on screen size and the room layout. A screen placed too high can cause neck strain, especially during long movies, sports, or gaming sessions.
Once the screen position is settled, mark its centerline on the wall and carry that line across the ceiling. A ceiling-mounted projector should normally sit on that same centerline. Even a small side-to-side offset can require lens shift or keystone correction, which may reduce image quality or limit your adjustment range.
Calculate Throw Distance Before Choosing a Ceiling Point
Throw distance is the distance from the projector lens to the screen. Every projector has a throw ratio, and that ratio determines how far back the projector must be to produce a specific image width.
The basic calculation is straightforward: screen width multiplied by the projector’s throw ratio equals the lens-to-screen distance. For example, if a 120-inch diagonal 16:9 screen is about 105 inches wide and the projector has a 1.5 throw ratio, the lens needs to sit roughly 157 inches from the screen.
That number is only the starting point. Many projectors have zoom lenses with a range of throw ratios, allowing some flexibility. Others, particularly short-throw and ultra-short-throw models, need very specific positioning. Do not measure from the back of the projector body. Manufacturers specify throw distance from the lens, and the body length can add several inches to your final ceiling measurement.
Before selecting a mount location, confirm four items:
- The planned screen’s actual viewable width, not only its diagonal measurement.
- The projector’s throw-ratio range and lens-to-screen measurement.
- Whether the projector has vertical or horizontal lens shift.
- The clearance needed behind and around the projector for cables and ventilation.
A tape measure, painter’s tape, and the projector specification sheet can prevent a costly relocation later. When the room is being remodeled, it is especially wise to plan this before drywall, paint, or ceiling treatments are complete.
Lens Shift Is Helpful, but It Is Not a Cure-All
Lens shift lets you move the image up, down, or sideways without tilting the projector. It is a valuable feature for ceiling installations, particularly when a ceiling joist does not fall at the ideal point. Still, lens shift has limits. A projector should be mounted as close to its intended optical position as possible, then fine-tuned with lens shift.
Keystone correction is different. It digitally reshapes a trapezoid image into a rectangle after the projector has been tilted or mounted off-axis. While it can be useful in temporary setups, it is not the preferred solution for a permanent theater installation. Keystone processing can reduce available resolution and often signals that the projector location needs to be corrected.
Choose a Mount Point That Is Structurally Sound
A ceiling projector mount must attach to solid structure. In many homes, that means locating ceiling joists. In some cases, blocking between joists or a properly installed mounting plate is needed to place the projector precisely on the screen centerline.
Do not rely on drywall anchors for a projector mount, even if the projector itself is relatively light. A mount carries the weight of the projector, the mount hardware, cable movement, and occasional adjustments over time. Secure fastening helps prevent sagging, vibration, and the far more serious risk of equipment falling.
Ceiling type affects the plan as well. Vaulted ceilings, tray ceilings, coffered ceilings, and exposed beams may require a drop pole or a specialized mounting approach. The goal is to keep the projector level and at the correct lens height without creating an awkward visual obstruction in the room.
For many Orange County homes, aesthetics are a major consideration. A clean installation can route cables through the ceiling, use a low-profile mount where appropriate, and position the projector so it feels intentional rather than added as an afterthought.
Plan for Seating, Image Size, and Viewing Comfort
A bigger screen is not automatically a better screen. The best size depends on how far people sit from it, the room’s available wall space, and how the projector performs at larger image sizes.
For a 4K projector, many viewers enjoy seating at roughly one to one-and-a-half times the screen’s diagonal measurement. For example, a 120-inch screen often works well with primary seating around 10 to 15 feet away. Preferences vary, though. Movie enthusiasts may enjoy a more immersive view, while family rooms used for casual TV, sports, and conversation may benefit from a slightly more comfortable distance.
Projector brightness also affects the decision. A larger screen spreads the projector’s available light over a bigger area. In a dedicated, darkened theater room, that may be no problem. In a living room with windows, light-colored finishes, and daytime viewing, a more modest screen size, brighter projector, or ambient-light-rejecting screen may deliver a better result.
Account for Power, Signal Cables, and Control
Projectors need nearby power, and that power should be installed safely and appropriately. Avoid running a standard extension cord through a wall or ceiling. A proper power solution at the projector location keeps the installation safer and cleaner.
For video, a quality HDMI cable is often the simplest answer, but cable selection becomes more important as distances increase. A long run carrying 4K HDR content, high refresh rates, or gaming signals may need an active optical HDMI cable or another approved signal extension method. Running a conduit during installation or remodeling is one of the best decisions you can make. It gives you a path to replace or upgrade cables later without opening the ceiling.
Think through where your sources will live. They may be in a media cabinet, equipment rack, adjacent closet, or behind the screen wall. Streaming devices, AV receivers, game consoles, and cable boxes all influence the cable route. Reliable WiFi is also essential when the projector depends on streaming content or wireless control.
Remote control deserves attention, too. If the projector is mounted behind the seating area, line-of-sight infrared control may not reach it. A properly configured universal remote, control system, or IR repeater can make startup simple: one button turns on the projector, lowers the screen if needed, selects the right input, and sets the audio system.
Leave Room for Heat, Noise, and Service Access
Projectors generate heat, and their air vents need breathing room. Follow the manufacturer’s clearance requirements around intake and exhaust vents. Tight soffits, decorative enclosures, and recessed pockets can look attractive, but they need enough airflow to avoid overheating and shortened lamp or laser-engine life.
Also consider projector fan noise. Mounting a projector directly above the main seating position may be convenient for placement, but a louder model can become noticeable during quiet scenes. Choosing a quieter projector, using the proper ceiling drop, or adjusting the seating layout can make a meaningful difference.
Service access is another practical detail. You should be able to reach the projector for filter cleaning, lens adjustments, firmware updates, or eventual replacement. A beautiful installation should not require cutting drywall just to swap an HDMI cable.
When Professional Placement Makes Sense
A ceiling projector installation brings electrical considerations, structural mounting, precise measurements, video signal planning, and calibration into one project. It can be manageable in a simple room, but premium projectors and finished ceilings leave little room for trial and error.
Tri Star Home Theater helps homeowners design projector systems around the way they actually use their rooms, whether that means a dedicated theater, a media room, or a living space that needs to look polished when the equipment is off. The goal is a properly sized image, reliable performance, concealed wiring, and controls that everyone in the home can use.
A well-placed projector disappears into the room while the picture takes center stage. Ready for a free consultation? Let’s get in touch! Call (949) 878-0531 Today