A surround system can have excellent speakers, a quality receiver, and a beautiful installation, yet still sound flat or distracting if the channels are not working together. Knowing how to calibrate surround speakers helps turn a collection of equipment into a convincing theater experience: dialogue stays anchored to the screen, effects move naturally around the room, and bass supports the movie instead of taking it over.
Calibration is not about making every speaker sound equally loud all the time. It is about setting the correct timing, level, crossover, and room correction so your system delivers the soundtrack as it was intended at your main seating position. A few careful adjustments can make a much bigger difference than an expensive equipment upgrade.
Start With Speaker Placement, Not Receiver Menus
Automatic calibration can compensate for many small issues, but it cannot fully fix speakers that are pointed in the wrong direction, blocked by furniture, or placed too close to the listener. Before running any test tones, confirm that the front left, center, and right speakers are positioned around the TV or projection screen, with the center channel aimed toward ear level whenever possible.
Surround speakers should sit slightly behind or beside the main seats, generally above ear height for a spacious effect rather than a speaker-in-your-ear feeling. If you have Dolby Atmos speakers, they need clear, intentional placement above the listening area or at the proper angle for up-firing designs. A crowded media room, open-concept living area, and dedicated theater room all call for different decisions, so do not force a textbook layout when the room will not support it.
Also check the basics before calibration: make sure every speaker is connected to the matching receiver terminal, positive and negative wiring is consistent, and nothing is resting against a driver or grille. A reversed speaker wire can weaken bass and make the front soundstage feel vague, even if the receiver reports that the channel is working.
How to Calibrate Surround Speakers With Your Receiver
Most modern AV receivers include a guided room-correction system. Depending on the manufacturer, it may use a supplied microphone and several measurements around the primary seating area. This is the right place to begin because the receiver can measure distance, channel level, speaker response, and the influence of the room.
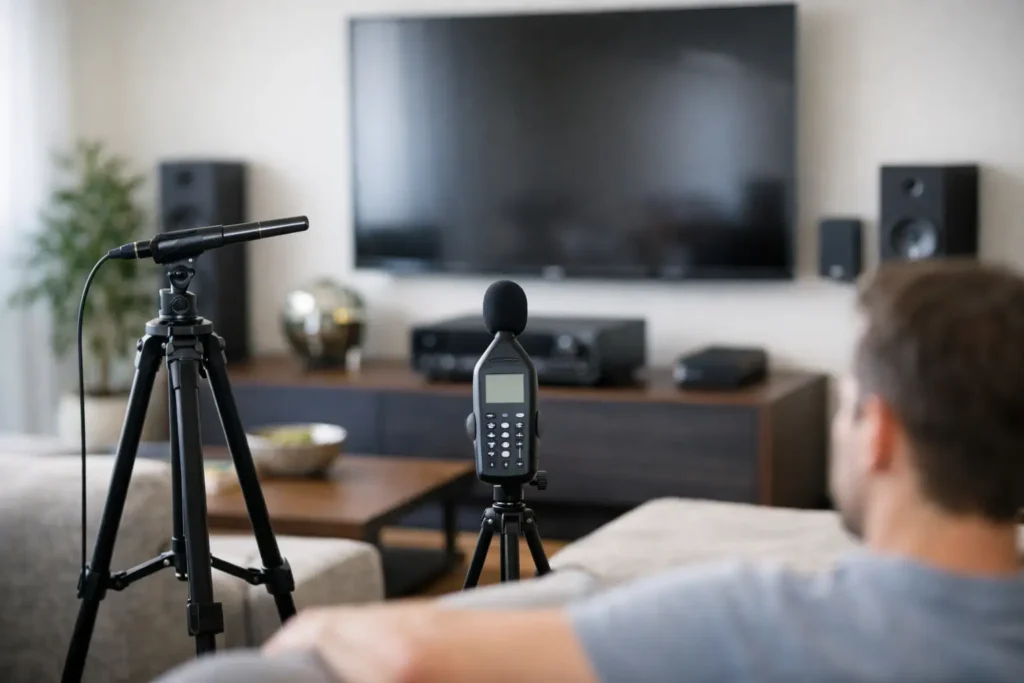
Place the calibration microphone at the height of your ears when seated. A camera tripod is ideal. Holding the microphone by hand, placing it on a sofa cushion, or setting it on a coffee table can produce inaccurate results because nearby surfaces affect the measurement. The microphone should be near the main listening position, not directly against the back of the couch.
Keep the room quiet while the receiver plays its test signals. Turn off HVAC fans if practical, keep pets out of the room, and pause appliances that create noticeable noise. Run the required first measurement at the primary seat, then move the microphone to the nearby locations requested by the receiver. Keep those additional positions within the actual seating area rather than spreading them across the entire room.
When the process finishes, review the results instead of accepting them without question. Receiver software is useful, but it occasionally identifies a speaker size incorrectly, sets an unusually low or high crossover, or reports a distance that does not make sense due to reflected sound. The numbers are a starting point, not a substitute for experienced judgment.
Check distances and channel levels
Speaker distances tell the receiver how much delay to apply so sound arrives at the main seat at roughly the same time. Measurements do not always match a tape measure exactly, especially for a subwoofer. A subwoofer’s reported distance may be longer because the receiver is accounting for processing delay. That is often normal.
Channel levels are usually displayed in decibels. Large adjustments can point to a placement, wiring, or equipment issue. For example, if one surround speaker needs a dramatically higher level than the other, check whether furniture, a wall opening, or a loose connection is affecting it. Do not chase perfectly matching numbers if the room itself is asymmetrical, but do investigate extreme results.
Set speaker size and crossover correctly
For most home theaters, set the main, center, and surround speakers to “Small” in the receiver menu, even if they are physically large floor-standing speakers. This setting does not describe cabinet size. It tells the receiver to redirect deep bass to the subwoofer, which is usually better suited for the job.
An 80 Hz crossover is a reliable starting point for many systems. Smaller bookshelf, in-wall, ceiling, or compact surround speakers may benefit from a higher setting, such as 90 Hz or 100 Hz. Larger speakers may handle a lower crossover well, but lower is not automatically better. Pushing small speakers too hard can make dialogue harsh and effects strained at higher volume.
If your receiver includes an LPF setting for the LFE channel, leave it at the standard 120 Hz unless your system design requires something different. This preserves the low-frequency effects track found in movie sound mixes.
Give the Subwoofer Its Own Attention
Subwoofer calibration is where many otherwise good systems lose their balance. A subwoofer should feel present without constantly calling attention to itself. If every explosion becomes a boom and every male voice sounds thick, the level may be too high or the placement may be working against the room.
Before running room correction, set the subwoofer’s low-pass crossover control to its highest setting or bypass mode, since the receiver will manage the crossover. Set phase to 0 degrees as a starting point and put the volume knob near its midpoint. Those settings give the receiver enough adjustment range without forcing it to make an extreme correction.
After calibration, listen to familiar scenes with dialogue, music, and controlled low bass. If the bass feels excessive, reduce the subwoofer level by a small amount in the receiver menu, often 2 to 3 dB at a time. Avoid making large changes based on one action scene. The goal is consistent, controlled bass across different content.
Placement matters as much as level. A subwoofer hidden in a cabinet or tucked into a corner may be convenient, but it can create muddy or uneven bass. In some rooms, moving it even a few feet can make a noticeable improvement. Multiple subwoofers can improve coverage across several seats, although they require more careful setup and are not necessary for every room.
Confirm the Center Channel and Surround Effects
The center channel carries most movie and television dialogue, so it deserves a real-world check after the automated process. Play a familiar scene with natural conversation. Voices should sound clear and connected to the screen, not muffled, thin, or as though they are coming from below the TV stand.
If the center speaker sits low inside furniture, gently angle it toward the seating position. If it is behind a cabinet door, remove the obstruction or revise the installation. Raising the center channel level slightly can help when dialogue remains difficult to understand, but do not use level as a fix for a speaker that is blocked, poorly aimed, or paired with an overly loud subwoofer.
For the surround channels, use content with rain, crowd ambience, music, or passing effects. You should notice a sense of space without hearing each surround speaker as a separate source. If effects pull too strongly to one side, verify placement and level. If the rear of the room seems silent, do not immediately turn the surrounds up dramatically. First confirm that the source is actually playing a surround format and that the receiver is using the intended listening mode.
Make Small Changes and Listen Over Time
Calibration is a process, not a one-time button press. Live with the system for several movies, a few television programs, and music you know well. Make only one change at a time, then listen again. This avoids the common mistake of changing levels, crossovers, processing modes, and subwoofer settings all at once, then having no idea which adjustment helped or hurt.
Room correction should generally remain enabled for movies, especially in rooms with hard floors, large windows, open walls, or challenging speaker locations. Some listeners prefer a different setting for two-channel music, but that depends on the receiver, speakers, and room. There is no universal setting that suits every home.
If calibration repeatedly produces odd results, the issue may not be in the menu. It could be an incorrectly wired speaker, poor placement, a damaged driver, an underpowered receiver, or a room that needs a more deliberate system design. This is particularly common after a remodel, a new TV installation, furniture changes, or an upgrade to Dolby Atmos.
A properly calibrated surround system should disappear into the experience. You should follow the story, feel the scale of the soundtrack, and hear dialogue without reaching for the remote. That is the difference careful setup makes in the rooms where your family actually watches, plays, and relaxes.
Ready for a free consultation? Let’s get in touch! Call (949) 878-0531 Today